Editing a module in WordPress is simple. Follow a few steps to customize.
WordPress offers flexibility for website design. Modules are building blocks of your site. You can change these to fit your needs. Whether you want to tweak a design or update content, editing a module helps. This guide will walk you through the process.
You’ll learn how to access and change modules easily. Understanding this skill will give you more control over your site. Ready to dive in? Let’s explore how to edit a module in WordPress step-by-step.
Preparing Your Environment
Editing a module in WordPress can be rewarding. But it requires careful preparation. This ensures a smooth and error-free process. Let’s dive into the steps to prepare your environment.
Backup Your Website
Before making any changes, backup your website. This step is crucial. It ensures you have a restore point if things go wrong. Use plugins like UpdraftPlus or BackupBuddy for easy backups.
- Install a backup plugin.
- Run the backup process.
- Save the backup file securely.
This way, you can restore your website to its previous state if needed.
Set Up A Staging Site
A staging site is a clone of your live website. It allows you to make changes without affecting the live site. Many hosting providers offer staging environments. If yours does not, you can use plugins like WP Staging or Duplicator.
- Create the staging site.
- Clone your live site to the staging environment.
- Test the changes in the staging site.
By using a staging site, you ensure that your live site remains unaffected by any errors or issues.
Credit: wpdesk.net
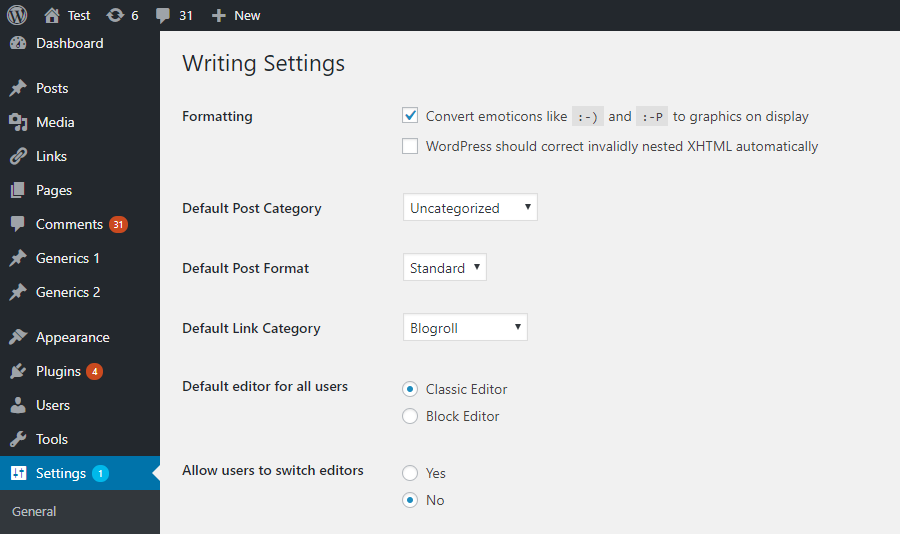
Accessing The WordPress Dashboard
Editing a module in WordPress starts with accessing the WordPress dashboard. The dashboard is the control panel for your WordPress site. From here, you can manage content, plugins, and settings.
Login Steps
First, you need to log into your WordPress account. Follow these simple steps:
- Open your web browser and go to your WordPress login page. This is usually found at
yourwebsite.com/wp-login.php. - Enter your username and password in the respective fields.
- Click the Login button.
Once logged in, you will see the WordPress dashboard.
Navigating To The Modules Section
After logging in, you need to navigate to the modules section. Follow these steps:
- Look at the left-hand side menu of the dashboard.
- Find and click on Appearance or Plugins depending on your theme.
- Under Appearance, select Widgets or Theme Options.
You will now see a list of modules you can edit.
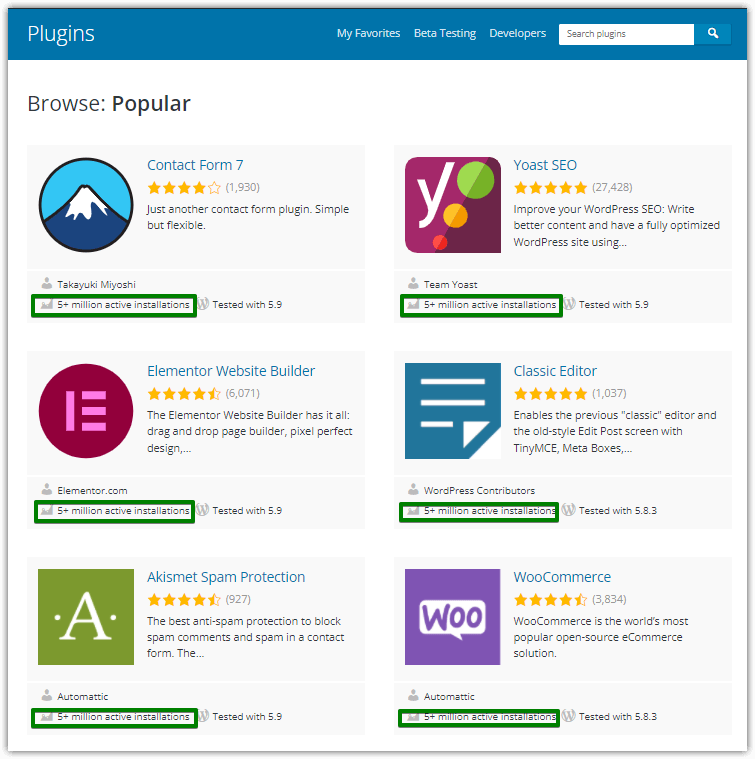
Locating The Module To Edit
Editing a module in WordPress can seem tricky at first. But it becomes easier once you know where to look. You need to locate the module you want to edit. There are different ways to do this. Here, we will discuss two main methods.
Using The Search Function
The search function is your best friend. Look for the search bar in your WordPress dashboard. Type the name of the module you need. Press enter. The results will show all related items. Choose the module you want to edit from the list. This method saves time. It is quick and easy.
Browsing Through Categories
Sometimes, you may not know the exact name of the module. In such cases, browsing through categories helps. Go to the plugins or modules section. Look for categories listed on the side. Click on the category related to your module. Scroll through the options. Once you find your module, click on it to edit. This method is useful if you explore different modules. It helps you become more familiar with your WordPress dashboard.

Credit: developer.wordpress.org
Editing The Module
Editing a module in WordPress allows you to tailor your website to your needs. It enhances functionality and improves user experience. Follow these steps to edit a module effectively.
Changing Module Settings
First, locate the module you wish to edit. Access the WordPress dashboard and navigate to the module section. Click on the module’s settings icon. Modify the settings as required. You can change titles, adjust visibility, or tweak other options. Save your changes to apply them.
Customizing Content And Layout
Next, customize the content within the module. Click on the content area of the module. Add or edit text, images, or other media. Use the editor tools to format your content. Ensure your content is clear and engaging.
Adjust the layout to fit your design. Drag and drop elements within the module. Align text, images, and buttons as desired. Preview your changes before saving. This ensures your module looks great on all devices.
Previewing Changes
When editing a module in WordPress, it’s important to preview changes. This ensures your updates look good and work well. Previewing helps you catch mistakes early. Let’s explore how you can effectively preview changes.
Using The Preview Button
WordPress has a built-in Preview button. This button lets you see your changes before making them live. To use it:
- Open the module you want to edit.
- Make your changes.
- Click the Preview button at the top right.
This opens a new tab. Here, you can see how your changes will appear to visitors. It’s a safe way to test updates without affecting your live site.
Checking For Errors
After previewing, check for errors. Look for broken links, missing images, and layout issues. It’s crucial to ensure everything works as expected.
Follow these steps to check for errors:
- Click on links to ensure they work.
- Check images to see if they load correctly.
- Look for alignment and formatting issues.
Testing your changes thoroughly helps maintain a professional and functional website. Remember, a smooth user experience is key.
| Task | Action |
|---|---|
| Preview Changes | Use the Preview button |
| Check for Errors | Test links, images, and layout |
By previewing changes and checking for errors, you ensure a better experience for your visitors. This practice helps keep your site professional and user-friendly.
Saving And Publishing
Editing a module in WordPress is a straightforward task. Saving and publishing your changes are the final steps. This ensures your updates are stored and visible to your audience. Let’s dive into the specifics of saving drafts and publishing your updated module.
Saving Drafts
Saving your work as a draft is crucial. It allows you to make changes without making them live. Here’s how you can save your module as a draft:
- Navigate to the module you are editing.
- Make the necessary changes.
- Look for the Save Draft button, usually located in the top-right corner of the editor.
- Click on Save Draft. This will store your changes without publishing them.
Saving drafts helps prevent data loss and gives you time to review your changes. You can always come back and continue editing.
Publishing The Updated Module
Once you are satisfied with your changes, it’s time to publish. Follow these steps to make your updated module live:
- Review your changes one last time.
- Locate the Publish button.
- Click on Publish. This will make your changes visible to everyone.
Publishing ensures your audience sees the latest updates. Always double-check your work before hitting publish.
Here’s a quick comparison between saving drafts and publishing:
| Action | Description | Visibility |
|---|---|---|
| Save Draft | Saves changes for later review. | Only visible to you. |
| Publish | Makes the changes live on your site. | Visible to everyone. |
Remember to save drafts often and publish only when ready. This keeps your content accurate and up-to-date.
Testing And Feedback
Editing a module in WordPress is only half the battle. The next crucial step is Testing and Feedback. Ensuring the module functions correctly and meets user expectations is vital. This process involves two key stages: Testing Functionality and Gathering User Feedback.
Testing Functionality
Before deploying any changes, it is essential to test the module’s functionality. You should verify that all features work as expected. Here are some steps to follow:
- Check for errors in the code.
- Ensure the module integrates smoothly with other plugins.
- Test across different browsers and devices.
- Confirm that the module does not slow down your site.
Using a staging environment is best for testing. This avoids disruptions on the live site. You can also use tools like WP Debug and Query Monitor to spot issues.
Gathering User Feedback
Once you confirm the functionality, gather user feedback. This step helps identify any issues users might face. Here’s how to gather useful feedback:
- Enable comments or a feedback form on the module page.
- Send surveys to your user base.
- Monitor user interactions and note any problems.
- Encourage users to report bugs or suggest improvements.
User feedback provides insights into real-world usage. It highlights areas for improvement and helps refine the module.
Consider creating a feedback table to organize user comments:
| User | Feedback | Action Taken |
|---|---|---|
| John Doe | Feature X is not working | Fixed in version 1.1 |
| Jane Smith | Module loads slowly | Optimized code |
Regularly reviewing and acting on feedback will ensure your module remains effective and user-friendly.
Troubleshooting Common Issues
Editing a module in WordPress can sometimes lead to unexpected problems. These issues can be frustrating but are often easy to fix. In this section, we will discuss common errors and how to resolve them. Let’s dive into the most frequent issues you might face.
Common Errors
While editing modules, you may encounter a variety of errors. Some of the most common ones include:
- White Screen of Death: This happens when your site displays a blank white screen.
- 500 Internal Server Error: This indicates a problem with the server.
- Module Not Saving: Changes to the module are not saved.
- Broken Layout: The design looks different or broken.
These errors can disrupt your workflow. But don’t worry, there are ways to fix them.
Fixing Compatibility Issues
Compatibility issues can arise when themes or plugins conflict with your module. To fix these issues, follow these steps:
- Deactivate All Plugins: Deactivate all plugins to check if any are causing the issue. Reactivate them one by one to identify the problematic plugin.
- Switch to a Default Theme: Temporarily switch to a default WordPress theme to see if the issue persists. If the problem resolves, the issue is with your theme.
- Update Everything: Ensure WordPress, themes, and plugins are up to date. Updates often fix compatibility issues.
- Check PHP Version: Ensure your server runs a compatible PHP version. WordPress recommends PHP 7.4 or higher.
By following these steps, you can identify and fix compatibility issues quickly. Remember to back up your site before making changes. This ensures you can restore it if something goes wrong.
Credit: wordpress.org
Frequently Asked Questions
How Do I Edit A Module In WordPress?
To edit a module, go to the dashboard, select the module, and click “Edit. “
Can I Edit A Module Without Coding?
Yes, you can use the WordPress editor or a page builder plugin.
Where Do I Find Modules In WordPress?
Modules are located in the dashboard, under “Appearance” or “Plugins. “
What Tools Help In Editing Modules?
Use plugins like Elementor or Beaver Builder for easy module editing.
How Do I Save Changes After Editing?
Click the “Update” or “Save” button to save your changes.
Is It Safe To Edit Modules Directly?
Editing modules directly can be risky. Always create a backup first.
Why Can’t I See My Changes?
Clear your cache or check if you have saved the changes properly.
Can I Revert Changes After Editing?
Yes, use the revision history to revert to a previous version.
Do I Need A Plugin To Edit Modules?
Not necessarily. You can edit modules using the built-in WordPress editor.
Are There Tutorials For Module Editing?
Yes, many websites and YouTube channels offer tutorials on module editing in WordPress.
Conclusion
Editing a WordPress module is simpler than it seems. Follow these steps carefully. Always back up your site before making changes. This prevents data loss. Use the WordPress dashboard for easy access. Modify the module using the editor. Save your changes and check the website.
Ensure everything looks good. Regular practice makes editing easier. Soon, you will edit modules confidently. Your website will improve as you gain skills. Keep learning and exploring WordPress. Happy editing!