Adding a post to a page in WordPress is straightforward. It’s a key skill for any site owner.
Whether you’re a beginner or seasoned blogger, this guide will help you. WordPress is a powerful tool for building websites and blogs. Knowing how to add posts to a page is essential. It helps keep content organized and accessible. This process improves user experience and site navigation.
In this blog post, you’ll learn simple steps to add posts to a WordPress page. We’ll cover everything from creating your post to displaying it on a page. Follow along to enhance your WordPress skills and make your site more engaging.
Credit: www.hostinger.com
Setting Up Your WordPress
Setting up your WordPress site is the first step to adding posts. It involves creating an account and choosing the right theme. This guide will help you through the initial setup process.
Creating An Account
Visit the WordPress website. Click on “Get Started”. Enter your email address and choose a username. Pick a strong password. Verify your email through the link sent to you. Log in to your new account. Congratulations, you now have a WordPress account!
Choosing A Theme
Log in to your WordPress dashboard. Navigate to “Appearance” on the left sidebar. Click on “Themes”. Browse through the available themes. Select one that fits your blog’s style. Click “Install”. After installation, click “Activate”. Your theme is now live. A good theme will make your blog look professional.
Credit: wordpress.com
Navigating The Dashboard
Understanding how to navigate the WordPress dashboard is crucial for managing your website. The dashboard is your control panel where you can add posts, edit pages, and manage settings. Let’s break down the key elements of the dashboard.
Understanding The Interface
The WordPress dashboard interface is user-friendly and straightforward. Here’s what you need to know:
- Sidebar Menu: Located on the left side, this menu gives access to different sections like Posts, Pages, Media, and Settings.
- Top Bar: This bar provides quick links for updates, comments, and creating new content.
- Main Area: The central part of the dashboard where you can view and edit content.
Key Features To Know
Several key features in the dashboard will help you manage your site effectively:
- Posts: Allows you to create, edit, and manage blog posts. You can categorize, tag, and schedule your posts here.
- Pages: Similar to Posts but used for static content like your About or Contact pages.
- Media: This section is for uploading and managing images, videos, and other media files.
- Comments: Here, you can moderate comments left by your visitors.
- Appearance: Customize the look of your site by changing themes, widgets, and menus.
- Plugins: Add extra functionality to your site by installing and managing plugins.
- Settings: Adjust the general settings of your site, including reading, writing, and permalinks.
Understanding these features will make your WordPress experience smoother and more efficient.
Creating A New Post
Creating a new post in WordPress is a straightforward process. This section will guide you through each step, ensuring your post is well-crafted and ready to publish. Let’s get started on creating a new post.
Accessing The Post Editor
First, log in to your WordPress dashboard. On the left-hand menu, hover over “Posts” and click on “Add New.” This action takes you to the post editor. Here, you can start writing your new post.
Basic Formatting Options
The post editor offers various formatting options. At the top, you’ll see a toolbar with icons. These icons help you format your text. You can bold or italicize text, create lists, and add headings.
To add a heading, click the “Paragraph” dropdown and select the desired heading level. You can also add links, images, and other media to make your post more engaging.
Remember, keeping your text clear and concise is key. Use short sentences and simple words. This way, your readers will easily understand your content.
Adding Content To Your Post
Adding content to your WordPress post is simple. You can insert text, images, and other media. This guide will show you how.
Inserting Text
To insert text into your WordPress post, follow these steps:
- Open your WordPress dashboard.
- Navigate to the Posts section.
- Click on Add New.
- Type your text in the provided editor.
Use the formatting options to style your text. You can make it bold, italic, or underline. Here is an example:
This is bold text.
This is italic text.
This is underlined text.
Adding Images And Media
Adding images and media can make your post more engaging. Follow these steps to add them:
- Click on the Add Media button above the editor.
- Choose Upload Files to add new images from your computer.
- Select Media Library to use existing images.
- Insert the selected image into your post.
You can also add videos, audio, and other media. Here is a quick reference table:
| Media Type | How to Add |
|---|---|
| Image | Click Add Media > Select Image > Insert |
| Video | Click Add Media > Select Video > Insert |
| Audio | Click Add Media > Select Audio > Insert |
Remember to add alt text to your images for better SEO. This helps search engines understand your content.
Customizing Your Post
Customizing your post on WordPress can make it stand out. It helps your audience find and engage with your content. Let’s explore some key customization features.
Using Categories And Tags
Categories and tags organize your content. They help users navigate your site. Categories group similar posts. Tags highlight specific details.
To add categories, go to the right side of the editor. Click on the ‘Categories’ section. Choose an existing category or create a new one. Use relevant keywords for better SEO.
Tags work similarly. Find the ‘Tags’ section below categories. Add keywords that describe your post. Use phrases your audience might search for.
Setting A Featured Image
A featured image represents your post. It appears at the top and in previews. A good image catches the reader’s eye.
To set a featured image, look for the ‘Featured Image’ box. Click on ‘Set featured image.’ Upload a new image or select one from your media library.
Choose high-quality images. Ensure they relate to your content. Use descriptive filenames for better SEO.
Publishing Your Post
After writing your post, the next step is to publish it. Publishing your post makes it visible to your audience. Here’s how you can preview and publish your post on WordPress.
Previewing The Post
Before you publish, it’s important to preview your post. This helps you catch any errors and see how your post will look to visitors.
- Click on the Preview button at the top right of the editor.
- A new tab will open, showing your post as it will appear on your site.
- Check for any formatting issues, spelling mistakes, or broken links.
Make any necessary changes. Preview the post again if needed.
Publishing Options
WordPress offers several publishing options. You can publish immediately or schedule for later. Here are the steps:
| Option | Action |
|---|---|
| Publish Immediately | Click the Publish button. Your post will go live instantly. |
| Schedule for Later | Click on the Edit link next to “Publish immediately”. Select the date and time. Click Schedule. |
| Save as Draft | Click the Save Draft button. Your post will be saved, but not published. |
| Private Post | Click on the Visibility option. Choose Private. Click OK, then Publish. |
Choose the option that suits you best. Publishing your post with the right settings is key to reaching your audience effectively.
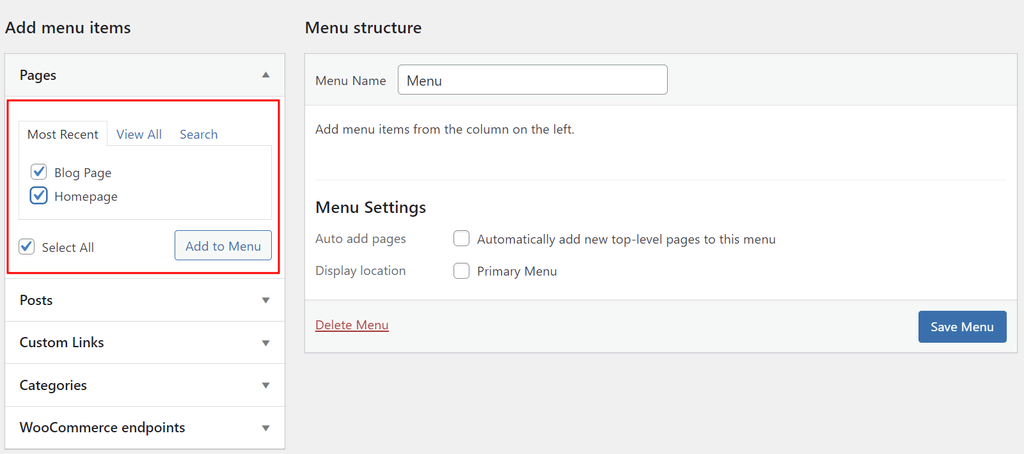
Adding Posts To A Page
WordPress is a flexible platform. One common task is adding posts to a page. You can display your blog posts on different pages. This makes it easy to organize content. Below, we will discuss two main methods.
Using The Block Editor
The Block Editor, also known as Gutenberg, is a powerful tool. It allows you to create and edit content easily. Follow these steps to add posts to a page:
- Open the page where you want to add posts.
- Click on the “+ Add Block” button.
- Search for the “Latest Posts” block.
- Click to add it to your page.
You can customize the “Latest Posts” block. Adjust the number of posts displayed. Choose to show or hide the post date. You can also change the layout to fit your design.
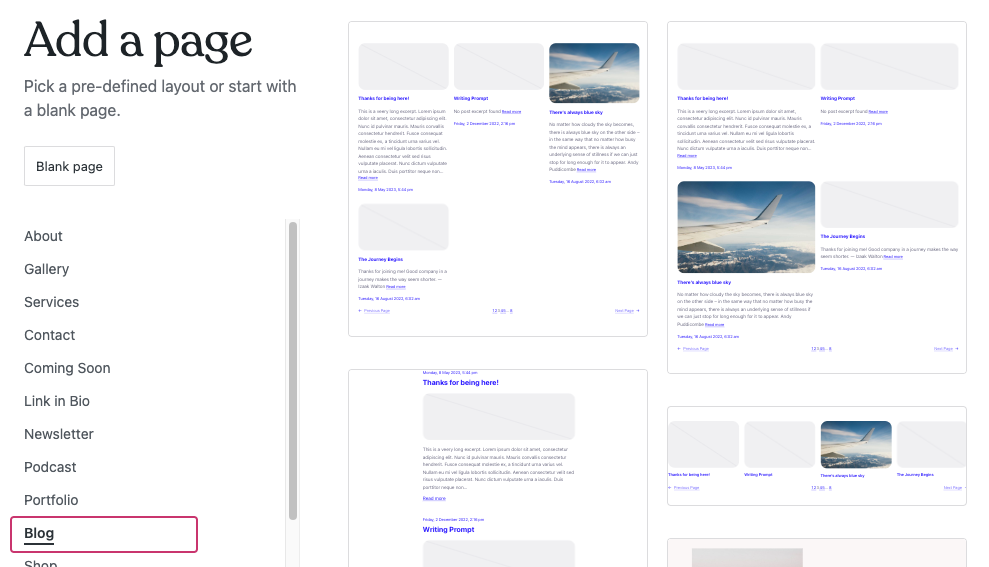
Displaying Posts On A Page
WordPress provides different ways to display posts. Here are some options:
- Using Shortcodes: Shortcodes are simple codes you can use. Add the
[recent-posts]shortcode to your page. This will display your recent posts. - Using Widgets: Go to Appearance > Widgets. Add the “Recent Posts” widget to your sidebar or footer. This will show your latest posts.
- Custom Page Templates: Create a custom page template. Use PHP code to query and display posts. This method requires coding skills.
These methods help you organize and showcase your content. Choose the one that fits your needs best.
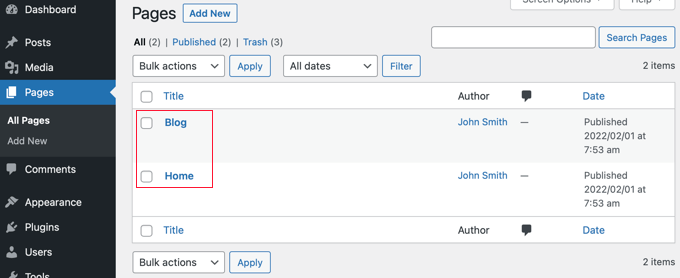
Managing Your Posts
Managing your posts in WordPress is essential for keeping your content organized. It ensures your visitors have a seamless experience. This section will guide you on editing existing posts and organizing them efficiently.
Editing Existing Posts
Editing existing posts in WordPress is straightforward. First, navigate to the Dashboard. Then, click on ‘Posts’ and ‘All Posts’. Here, you’ll see a list of all your posts.
To edit a post, hover over it and click ‘Edit’. This will open the post in the editor. You can make changes to the content, add images, or update links. Once done, click ‘Update’ to save your changes.
Remember to preview your post before updating. This ensures everything looks correct. Editing posts regularly keeps your content fresh and accurate.
Organizing Posts
Organizing posts helps your readers find relevant content easily. Use categories and tags to group similar posts. To add a category, go to ‘Posts’ and ‘Categories’. Here, you can create new categories and assign them to your posts.
Tags work similarly. Go to ‘Posts’ and ‘Tags’ to create and assign tags. Tags are more specific than categories. They help in further refining your content organization.
Consider using a consistent naming convention. This makes it easier to manage and navigate your posts. You can also use plugins to enhance post organization. Some plugins offer advanced sorting and filtering options.
Tips And Best Practices
Adding a post to a page in WordPress involves more than just hitting publish. Following some tips and best practices can make your content more effective. This can help you attract more readers and keep them engaged.
Seo Optimization
SEO optimization is key to making sure your post gets found. Use relevant keywords in your title and throughout your content. This will help search engines know what your post is about.
Make sure to use headings and subheadings. These make your content easier to read and help search engines understand its structure. Add alt text to images to describe them. This improves your SEO and makes your content accessible.
Include internal and external links. Internal links connect to your other posts, while external links go to other websites. Both types of links are good for SEO.
Engaging Your Audience
Engaging your audience keeps them on your page longer. Use a conversational tone. Write as if you are speaking directly to the reader.
Ask questions to involve your audience. This makes them think and keeps them interested. Use short paragraphs and sentences. This makes your content easier to read and understand.
Include images and videos. These can make your post more interesting and break up the text. Encourage comments. Ask your readers to share their thoughts or ask questions.
Credit: www.wpbeginner.com
Frequently Asked Questions
How Do I Add A Post To A Page In WordPress?
Go to your WordPress dashboard. Click on “Pages” and select the page. Add your post content.
Can I Show Blog Posts On A Specific Page?
Yes, you can. Use the “Settings” > “Reading” section to choose a specific page for posts.
How Do I Create A New Post In WordPress?
In the dashboard, go to “Posts” and click “Add New. ” Write your content and publish.
Can I Add A Post To A Static Homepage?
Yes, use a plugin or modify the homepage settings to display posts.
How Do I Categorize Posts In WordPress?
While creating a post, select the appropriate category from the “Categories” section on the right.
How Do I Add Images To My WordPress Post?
In the post editor, click “Add Media. ” Upload or select an image and insert it.
Can I Schedule Posts In WordPress?
Yes, use the “Publish” section. Click “Edit” next to “Publish immediately” and set your date and time.
How Do I Edit An Existing Post?
Go to “Posts” in the dashboard. Find your post and click “Edit. ” Make changes and update.
How Do I Display Recent Posts On A Page?
Use a widget or shortcode to display recent posts on any page.
How Do I Add A Featured Image To A Post?
In the post editor, find the “Featured Image” section. Click “Set featured image” and choose an image.
Conclusion
Adding a post to a WordPress page is simple. Follow the steps we’ve shared. First, log in to your WordPress dashboard. Next, navigate to the pages section. Choose the page where you want to add the post. Use the block editor to include your content.
Remember to save your changes. Finally, check your page to see the update. Practice these steps regularly. Soon, you will become comfortable with the process. Enjoy creating and sharing your content on WordPress. Happy blogging!
You actually make it seem so easy with your presentation but I find this
matter to be really something which I think I would never understand.
It seems too complicated and very broad for me. I’m looking forward for your next post, I will try to get
the hang of it!
Wonderful post, many thanks for explaining.
I view something really special in this website.